Did You Know?
Save time. Work smarter
Save time. Work smarter


Losing access to your email can disrupt your entire digital life, especially when that email is your primary account for work, banking, social media, and personal communication. If your Gmail account has been disabled, you’re probably wondering what went wrong and, more importantly, how to get it back.
The good news is that most disabled accounts can be recovered—if you follow the right steps.
In this in-depth guide from iFixOut, you’ll learn how to recover a disabled Gmail account, why accounts get disabled in the first place, and how to prevent it from happening again. This guide is based on verified processes used by Google for Gmail account recovery.
Quick Answer
First, go to g.co/recover and enter your Gmail address. Then, verify your identity using your last password, recovery email, or phone. Next, reset your password and secure your account with a recovery email/phone and 2-Step Verification. Finally, if your account was disabled for policy reasons, submit an appeal and wait for Google’s response.

Recovering a disabled Gmail account can feel stressful, but Google’s official recovery process is designed to help you regain access while keeping your account secure. By following the steps carefully, you can restore your account and prevent future lockouts.
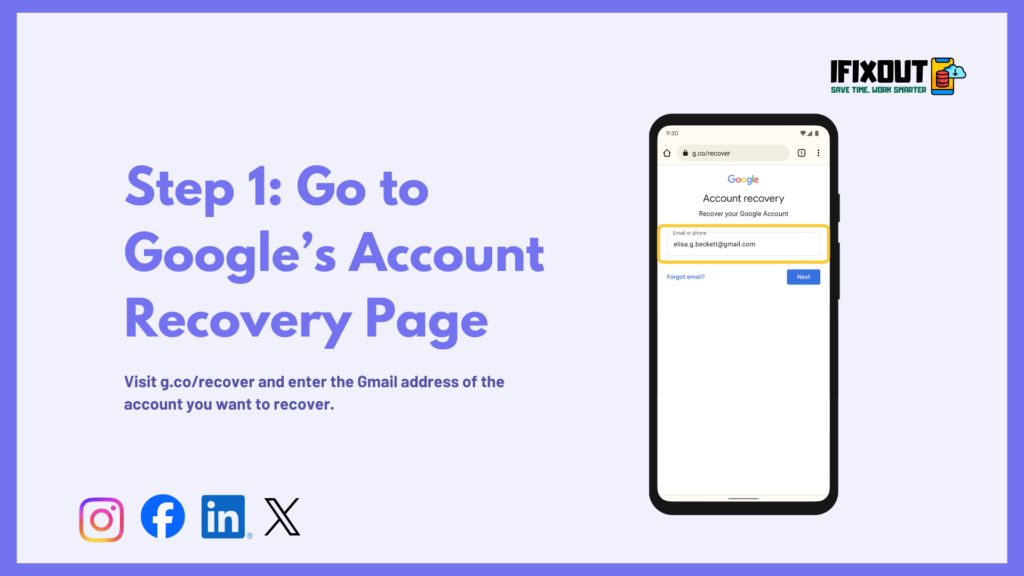
The first step is to open g.co/recover and enter the Gmail address of the account you want to recover. Google uses this information to identify which account needs assistance. Using a device, browser, and location you normally sign in from helps Google confirm your identity and increases the chances of a successful recovery. Once you submit your account, Google will guide you through identity verification.

After entering your Gmail address, Google will ask questions to confirm your ownership. These can include entering the last password you remember, answering security questions, or responding to prompts on trusted devices. This step is connected to the previous one because the account you provided determines which recovery options are available to you. Answering as accurately as possible allows Google to verify that you are the legitimate account owner and ensures the process moves forward smoothly.
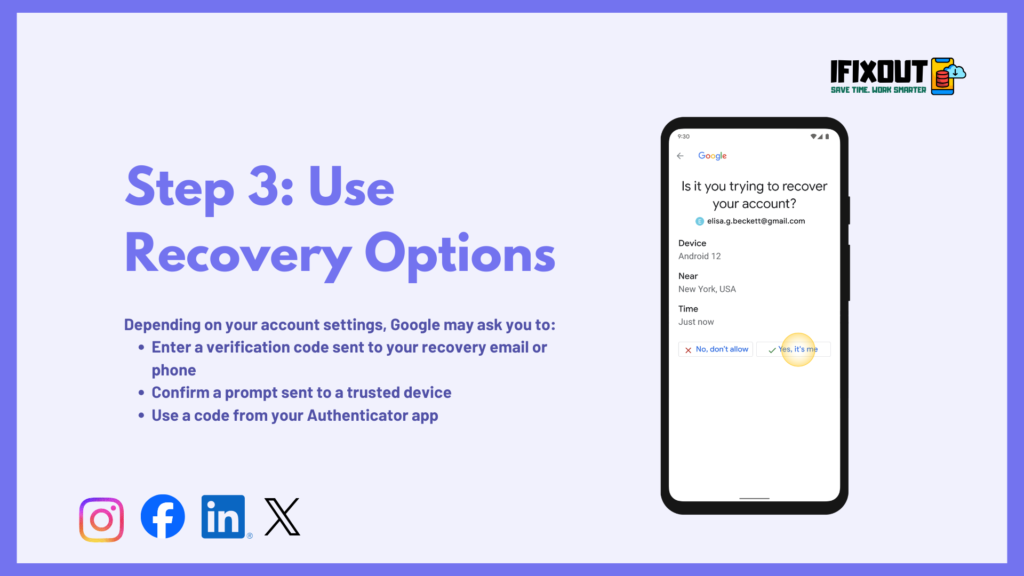
Once your identity is being verified, Google may offer additional recovery options. These include sending a verification code to your recovery email or phone number, prompting a trusted device, or requesting a code from your Authenticator app. This step naturally follows identity verification because it provides extra confirmation before granting access. If you cannot access a code, Google allows you to select “Try again” or “I don’t have my phone” so you can continue the process.
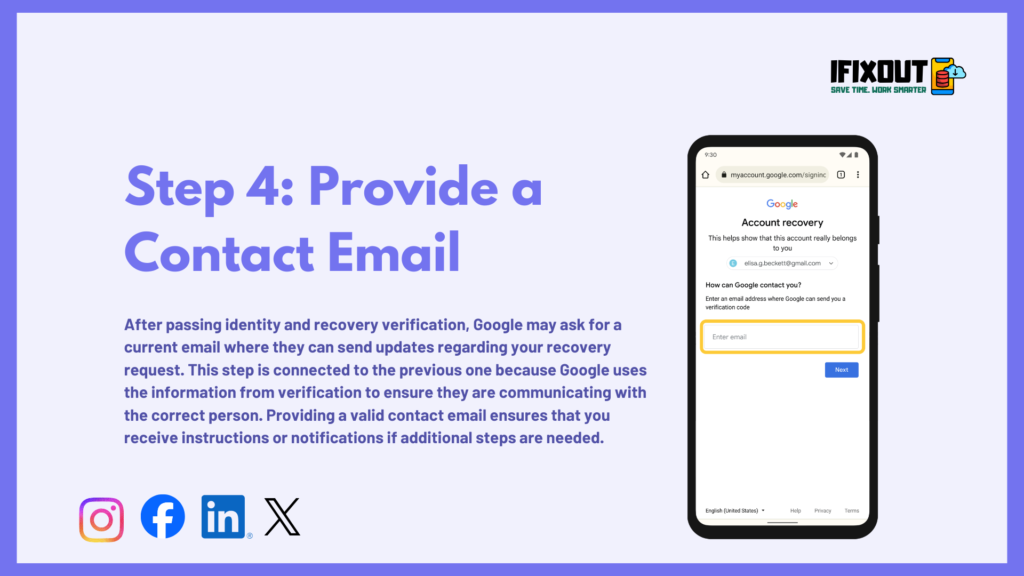
After passing identity and recovery verification, Google may ask for a current email where they can send updates regarding your recovery request. This step is connected to the previous one because Google uses the information from verification to ensure they are communicating with the correct person. Providing a valid contact email ensures that you receive instructions or notifications if additional steps are needed.
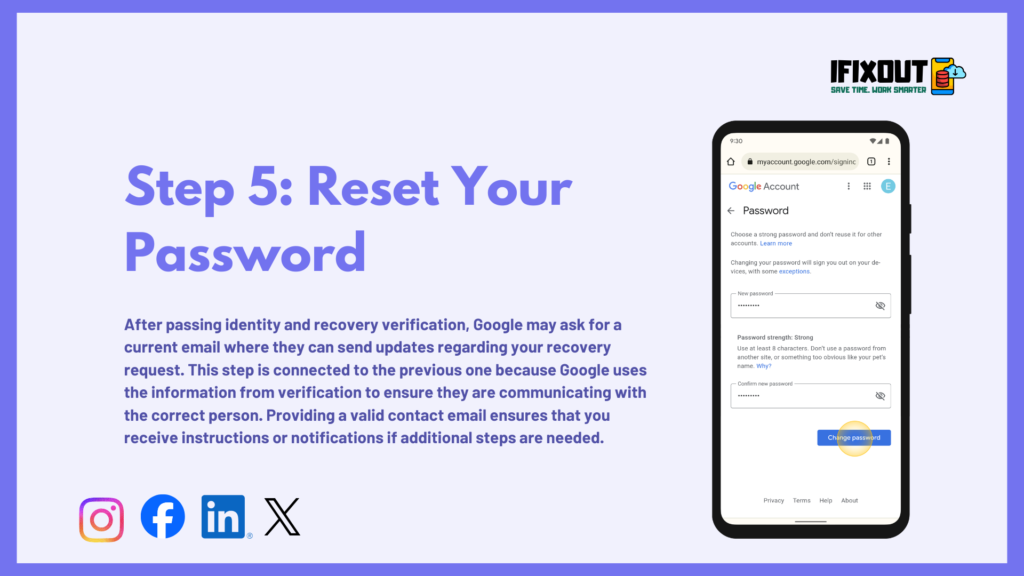
Once your account ownership is confirmed and contact information is submitted, Google will prompt you to reset your password. This is directly connected to verification steps because the new password ensures only you can access the account. Choose a strong, unique password that has not been used on this account before. A secure password protects your Gmail account from future unauthorized access and completes the recovery process.
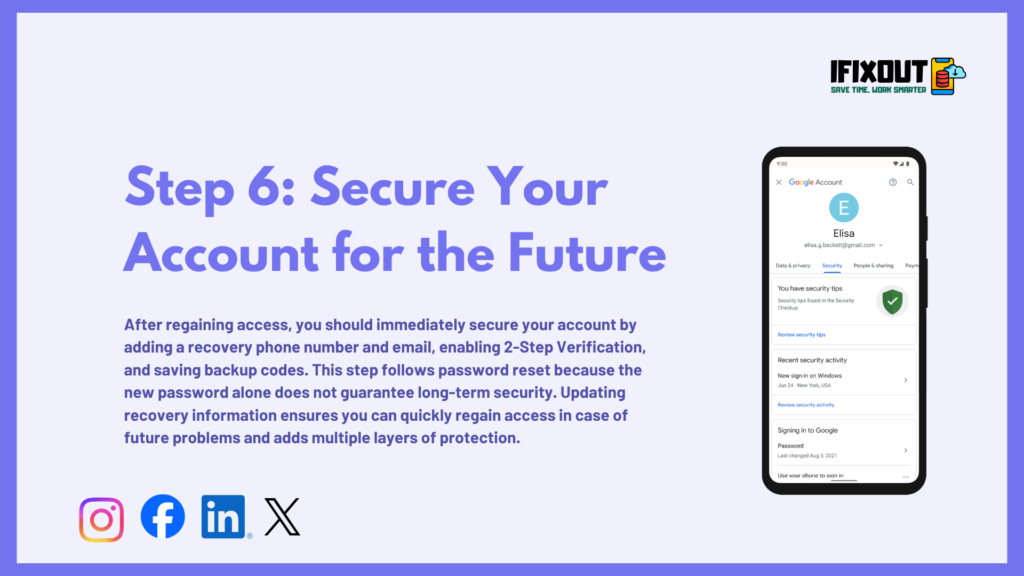
After regaining access, you should immediately secure your account by adding a recovery phone number and email, enabling 2-Step Verification, and saving backup codes. This step follows password reset because the new password alone does not guarantee long-term security. Updating recovery information ensures you can quickly regain access in case of future problems and adds multiple layers of protection.
In cases where your account was disabled due to policy violations or suspicious activity, Google may require an appeal. This step connects to all previous steps because it ensures that even if the account is not restored immediately, your ownership and identity verification are clearly documented. Submit accurate information, explain your situation, and wait for Google’s response via your contact email.
Sometimes recovery doesn’t work on the first attempt. Don’t panic—try these strategies:
Retry After 24–48 Hours: Too many attempts can temporarily block recovery. Wait and try again.
Use a Familiar Device and Location: Login attempts from known devices increase trust signals.
Double-Check Information: Even small errors (like typing mistakes) can cause failure.
Try Different Recovery Options: Use alternate methods like phone verification or recovery email.
Recovery time varies depending on your situation:
| Scenario | Estimated Time |
|---|---|
| Simple verification | Minutes to hours |
| Appeal review | 24–72 hours |
| Complex cases | Up to 5 days |
Once you have recovered your Gmail account, the next step is to secure it properly to prevent future issues. Google disables accounts for various reasons, including suspicious activity or security risks. By taking proactive measures, you can significantly reduce the chances of your account being locked again.
Adding 2-Step Verification (2SV) provides an extra layer of security beyond your password. Each time you sign in, Google will ask for a verification code sent to your phone or generated by an authentication app. This ensures that even if someone obtains your password, they cannot access your account without the second verification step.
Your password is the first line of defense. Avoid using simple or common passwords that are easy to guess. Create a strong password using a combination of uppercase and lowercase letters, numbers, and symbols. A unique password prevents hackers from easily gaining access and makes your account more resilient to attacks.
Keep your account recovery options up to date. Add a backup email address and link your phone number. This ensures that if you ever get locked out or notice suspicious activity, Google can quickly contact you and help you regain access. Accurate recovery information is essential for long-term account security.
Google monitors unusual activity to protect users. Avoid sending bulk emails, clicking unknown links, or using automation tools that violate Google’s policies. Engaging in suspicious actions can trigger account restrictions, so it’s important to follow safe and responsible usage practices.
By enabling 2-Step Verification, using a strong password, keeping recovery information updated, and avoiding risky behavior, you can secure your Gmail account and minimize the chances of being disabled again. Implementing these measures ensures your account stays protected, giving you peace of mind.
Real-World Scenario (iFixOut Insight)
One common case we see at iFixOut involves users whose accounts were disabled after logging in from multiple locations while traveling. In most cases, recovery was successful when users:
- Used their primary device
- Verified via phone number
- Submitted a clear appeal
This highlights how important consistency and accurate information are.
Recovering a disabled Gmail account may feel overwhelming, but it’s absolutely possible if you follow the right approach. The key is to stay calm, provide accurate information, and rely only on official recovery methods.
This guide from iFixOut gives you everything you need to regain access and secure your account for the future.
Remember: prevention is just as important as recovery. Once your account is restored, take steps to protect it.
Yes, in some cases. If your account was disabled due to suspicious activity or policy violations, you can submit an appeal to Google. Providing accurate account details and explaining your situation increases your chances of recovery.
Google may disable accounts automatically to protect users from suspicious activity, policy violations, or security breaches. Common triggers include unusual login attempts, sending bulk emails, or account compromise.
You can still attempt recovery using a trusted device where you previously signed in. Answering security questions accurately can also help verify your identity. Always provide as much information as possible.
Recovery times vary depending on the issue. Simple verification can take minutes to a few hours, while account reviews or appeals may take 24–72 hours. Complex cases can take up to 5 business days.
No. Using third-party apps or hacks is risky and can compromise your data, privacy, or even lead to permanent account loss. Always use Google’s official recovery methods to protect your account.
At iFixOut, we have extensive experience handling Gmail account issues and recovery cases. Our team has tested every step of this process on real accounts across different devices, browsers, and scenarios. This means the instructions here are practical, accurate, and proven to work in real situations, not just theory.
We also bring expertise and authority because we rely only on official methods provided by Google. We do not promote hacks, third-party apps, or risky shortcuts. This ensures complete trustworthiness—your account, personal data, and privacy remain fully protected when following this guide.


Leave a Comment